programming4us


Applications Server

Microsoft Systems Management Server 2003 : Modifying Installation Scripts Using the Installation Expert (part 2)

- Free product key for windows 10
- Free Product Key for Microsoft office 365
- Malwarebytes Premium 3.7.1 Serial Keys (LifeTime) 2019
5/29/2012 4:14:34 PM
You should verify and modify the two remaining installation attributes—System Configuration and Advanced Configuration—according to your specific target computer needs. Although our installation example doesn’t make any modifications to these attributes, let’s look at the two installation attribute Properties dialog boxes briefly. Keep in mind that you need to verify these settings just as we’ve verified our other attribute settings. To configure these Properties dialog boxes, follow these steps:

1.
In 
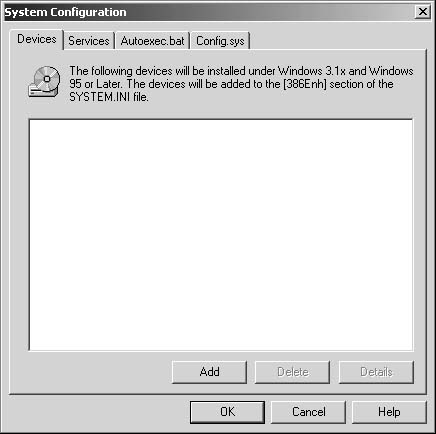
the Installation Expert window, select System Configuration and click Properties to display the System Configuration dialog box, shown in Figure 12.

Figure 12. The System Configuration dialog box.


2.
In the Devices tab, you can add or delete devices or modify device properties on 16-bit Windows systems. This tab modifies the [386Enh] section of the System.ini file.
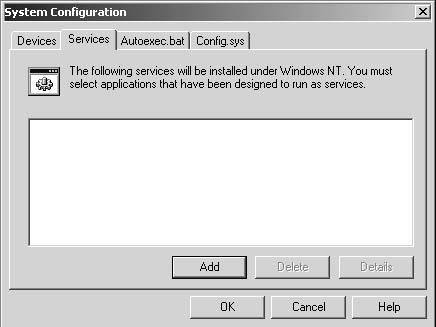
3.
Select the Services tab, shown in Figure 13. Here you can add system services to, or modify system services in, the Control Panel.
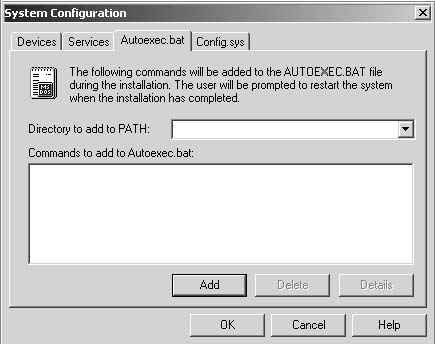
Figure 13. The Services tab of the System Configuration dialog box.


4.
Select the Autoexec.bat tab, shown in Figure 14. In this tab, you can produce a script that will modify the system’s Autoexec.bat file by adding new lines or appending to existing lines, such as altering the PATH statement or adding SET variable statements.
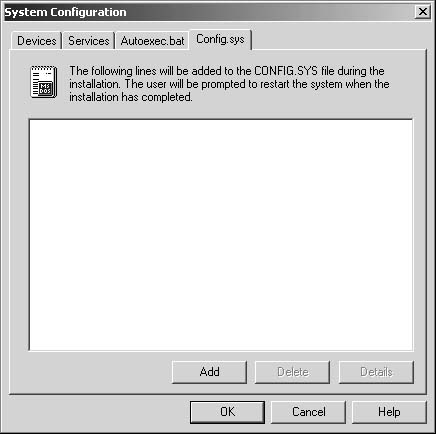
Figure 14. The Autoexec.bat tab of the System Configuration dialog box.


5.
Select the Config.sys tab, shown in Figure 15. In this tab, you can produce a script to modify the Config.sys file. After you configure each of these tabs, click OK to return to the Installation Expert interface.
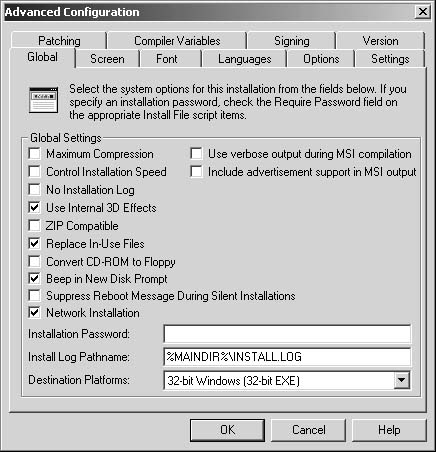
Figure 15. The Config.sys tab of the System Configuration dialog box.


6.
Select Advanced Configuration and click Properties to display the Advanced Configuration dialog box, shown in Figure 16.

Figure 16. The Advanced Configuration dialog box.


7.
In the Global tab, you can modify the installation file settings, such as compression, log settings, suppression of reboot message during silent installs, and use of an installation password.

8.
Select the Screen tab, where you can select options for the installation progress bar settings and display background gradient of installation dialog boxes. Display color options used during the installation can also be selected here.

9.
Select the Font tab to specify the default font used to display all installation screens and dialog boxes.

10.
Select the Languages tab to configure the language settings used for the installation.

11.
Select the Options tab, where you can specify the Script Editor and compiler settings to be used by SMS Installer. You can also set options for the Watch Application Wizard to ignore specific DLLs.

12.
Select the Settings tab, where you can specify the paths (or browse for) the installation executable file, the .INI file that contains language translations for the installation, the setup icon, the directory that contains setup dialog boxes, and the directory that contains temporary files.

13.
Select the Patching tab, where you can create patching versions of files. You can select patching threshold levels based on a percentage of change to an existing file, configure memory settings used during the patch process, and configure the compression level for patch files.

14.
Select the Compiler Variables tab, where you can configure the compiler used during the compilation of the installation script and enable user-prompted compiler variables when compiling from the command prompt.

15.
Select the Signing tab, where you can set up a secure installation environment used in 32-bit installations. From this tab, you can also create a CAB-formatted installation file and supply the contents of Setup.inf, commonly used during setup to provide installation settings.

16.
Select the Version tab, where you can enter additional information about the setup program, such as a description, copyright information, company name, product version, and so on.

As you can see, these installation attributes will enable you to modify your installation script and help it to compile and run more smoothly. Although you can configure these options prior to running the Repackage Installation Wizard or the Watch Application Wizard, it’s usually a good idea to return to the Installation Expert after running either wizard and verify all your configuration options and settings.

Other -----------------
- Sizing Considerations for mySAP Components (part 2) - Sizing mySAP Business Intelligence & Sizing mySAP SRM
- Sizing Considerations for mySAP Components (part 1) - The SAP Exchange Infrastructure
- Active Directory Domain Services 2008 : Transfer the Infrastructure Master Role
- Active Directory Domain Services 2008 : Transfer the PDC Emulator Role
- SAP Hardware, OS, and Database Sizing
- Preparing for the SAP Sizing Process
- Microsoft Systems Management Server 2003 : Systems Management Server Installer Tools & Creating Installation Scripts
- Installing Systems Management Server Installer
- Microsoft Dynamic GP 2010 : Installing Integration Manager (part 2) - SQL Server maintenance jobs
- Microsoft Dynamic GP 2010 : Installing Integration Manager (part 1) - SQL Server and database settings
- Active Directory Domain Services 2008 : Transfer the RID Master Role
- Active Directory Domain Services 2008 : Transfer the Domain Naming Master Role
- Microsoft Dynamics AX 2009 : Working with Forms - Modifying application version
- Microsoft Dynamics AX 2009 : Working with Forms - Modifying the User setup form
- Microsoft Dynamics AX 2009 : Working with Forms - Adding a Go to the Main Table Form link
- Designing and Optimizing Storage in an Exchange Server 2007 Environment (part 4)
- Designing and Optimizing Storage in an Exchange Server 2007 Environment (part 3) - Adding in Fault Tolerance for External Storage Systems
- Designing and Optimizing Storage in an Exchange Server 2007 Environment (part 2) - Designing the Right Data Storage Structure for Exchange Server 2007
- Designing and Optimizing Storage in an Exchange Server 2007 Environment (part 1) - When Is the Right Time to Implement NAS and SAN Devices?
- Engaging the SAP Solution Stack Vendors : General Sizing Best Practices and Approaches


Top 10
 
- Microsoft Visio 2013 : Adding Structure to Your Diagrams - Finding containers and lists in Visio (part 2) - Wireframes,Legends
- Microsoft Visio 2013 : Adding Structure to Your Diagrams - Finding containers and lists in Visio (part 1) - Swimlanes
- Microsoft Visio 2013 : Adding Structure to Your Diagrams - Formatting and sizing lists
- Microsoft Visio 2013 : Adding Structure to Your Diagrams - Adding shapes to lists
- Microsoft Visio 2013 : Adding Structure to Your Diagrams - Sizing containers
- Microsoft Access 2010 : Control Properties and Why to Use Them (part 3) - The Other Properties of a Control
- Microsoft Access 2010 : Control Properties and Why to Use Them (part 2) - The Data Properties of a Control
- Microsoft Access 2010 : Control Properties and Why to Use Them (part 1) - The Format Properties of a Control
- Microsoft Access 2010 : Form Properties and Why Should You Use Them - Working with the Properties Window
- Microsoft Visio 2013 : Using the Organization Chart Wizard with new data
- First look: Apple Watch

- 3 Tips for Maintaining Your Cell Phone Battery (part 1)

- 3 Tips for Maintaining Your Cell Phone Battery (part 2)
programming4us programming4us